





August 1, 2026
Live Event Video Setup Checklist for Event Planners
A successful live event video setup requires proper equipment, reliable internet connectivity, and systematic testing protocols. Event planners must coordinate cameras, audio systems, streaming platforms, and backup solutions while ensuring technical crews understand their roles and contingency plans are in place.
Key Takeaways
What Equipment Do You Need to Live Stream an Event
Essential live streaming equipment includes cameras with clean HDMI output, audio capture devices, encoding hardware or software, reliable internet connection, and streaming platform access. The complexity of your setup depends on production quality goals and audience size expectations.
Basic Single-Camera Setup:
Multi-Camera Professional Setup:
Choose a single-camera setup if your budget is under $3,000 and the event has simple staging. Opt for multi-camera production when budget exceeds $8,000 and you need dynamic coverage of speakers, audience reactions, and stage activities.
Common Equipment Mistake: Using consumer webcams or built-in laptop cameras for professional events. These devices lack manual controls, produce poor image quality in varying lighting conditions, and often have unreliable audio capture that creates viewer frustration.
How Do You Set Up Live Video Streaming for a Conference
Conference live streaming setup requires positioning cameras to capture speakers and presentation screens, connecting audio directly from the venue's sound system, and configuring streaming software with proper encoding settings. Start setup and testing at least 4 hours before the conference begins.
Step-by-Step Conference Setup Process:
Audio Integration Best Practices:
Work with professional AV specialists for conferences with 200+ attendees or complex technical requirements. They bring specialized equipment, experienced crews, and proven troubleshooting protocols that prevent costly technical failures.
What's the Difference Between Streaming to YouTube vs Facebook Live
YouTube Live offers better video quality, longer stream duration, and superior discoverability, while Facebook Live provides easier audience engagement tools and better integration with social media marketing campaigns. Choose based on where your target audience spends time and your content distribution goals.
YouTube Live Advantages:
Facebook Live Advantages:
Multi-Platform Streaming: Use services like Restream or OBS Studio with multiple stream keys to broadcast simultaneously to YouTube, Facebook, LinkedIn, and other platforms. This approach maximizes audience reach but requires higher internet bandwidth and more powerful encoding equipment.
Platform Selection Rule: Choose YouTube for educational content, product launches, and evergreen events that benefit from long-term discoverability. Select Facebook for community events, behind-the-scenes content, and campaigns focused on immediate audience engagement and social sharing.
How Much Does It Cost to Live Stream an Event
Live streaming costs range from $500-$2,000 for basic DIY setups to $5,000-$25,000+ for professional multi-camera productions with dedicated crews. Equipment rental, staffing, and internet connectivity represent the largest expense categories.
Budget Breakdown by Production Level:
Additional Cost Factors:
Cost-Saving Strategy: Rent equipment locally and hire experienced AV technicians from the event city rather than flying in crews from distant locations. This approach reduces travel expenses while ensuring technical support arrives familiar with local venues and suppliers.
Best Practices for Live Event Video Setup
Successful live event video setup requires systematic equipment testing, redundant backup systems, clear crew communication protocols, and contingency plans for common technical failures. Start preparation at least one week before the event date.
Pre-Event Preparation Checklist:
Camera Positioning Best Practices:
Audio Quality Priorities:
Lighting Considerations:
Critical Setup Mistake: Relying solely on venue Wi-Fi for internet connectivity. Always arrange dedicated wired internet or cellular backup connections, as shared Wi-Fi networks often become unstable when hundreds of attendees connect simultaneously.
How Do You Test Your Live Stream Setup Before the Event
Test your live stream setup by conducting full dress rehearsals with actual speakers, running equipment for extended periods under event conditions, and verifying backup systems function properly. Complete testing at least 24 hours before the event begins.
Comprehensive Testing Protocol:
Technical Systems Test (2-3 days before):
Full Dress Rehearsal (1 day before):
Day-of-Event Testing:
Testing Documentation:
Red Flag Indicators: If video drops frames during testing, audio has noticeable delays, or internet speed tests show inconsistent results, postpone the event or arrange professional technical support immediately. These issues worsen under actual event stress conditions.
What Internet Speed Do You Need for Live Streaming
Live streaming requires upload speeds of at least 5-10 Mbps for HD quality, with recommended speeds of 15-25 Mbps for professional productions and backup bandwidth allocation. Download speeds matter less than consistent, dedicated upload capacity.
Internet Speed Requirements by Quality:
Connection Type Priorities:
Bandwidth Testing Protocol:
Internet Backup Strategy:
Always arrange secondary internet connections from different providers or cellular networks. Configure streaming software to automatically switch connections if primary bandwidth drops below acceptable levels.
Venue Internet Mistake: Assuming venue "high-speed internet" meets streaming requirements. Many venues offer fast download speeds but severely limited upload capacity that cannot support live streaming. Always request specific upload speed guarantees in writing before booking.
How Do You Handle Audio Issues During a Live Stream
Address audio issues during live streams by monitoring levels continuously, having backup microphones ready, and training crew members to make quick adjustments without interrupting the event flow. Assign dedicated audio personnel for events longer than 30 minutes.
Real-Time Audio Problem Solutions:
Microphone Feedback:
Low Audio Levels:
Audio Delay or Sync Issues:
Background Noise Problems:
Emergency Audio Protocols:
Audio Crew Communication: Use headset communication systems so audio technicians can coordinate adjustments without disrupting the event. Professional audio engineers bring specialized equipment and experience managing complex audio challenges during live events.
Should You Hire a Professional Videographer or Do It Yourself
Hire professional videographers for events with budgets over $5,000, complex technical requirements, or high-stakes presentations where technical failures create significant business consequences. Handle simple, single-camera streams internally when budget constraints exist and technical complexity remains minimal.
When to Hire Professionals:
DIY Approach Works When:
Professional Videographer Benefits:
Cost-Benefit Analysis:
Compare professional videographer costs against potential revenue loss from technical failures. A $3,000 professional crew investment often prevents $10,000+ losses from failed product launches or missed sales opportunities during critical presentations.
Hybrid Solution: Hire experienced AV technicians for technical setup and monitoring while maintaining internal control over content and presentation flow. This approach reduces costs while ensuring professional technical execution.
What's the Best Camera for Live Streaming Events
Professional camcorders with clean HDMI output, manual exposure controls, and external audio inputs provide the best live streaming performance for events. DSLR and mirrorless cameras offer superior image quality but require additional accessories for extended operation.
Recommended Camera Categories:
Professional Camcorders:
DSLR/Mirrorless Cameras:
PTZ (Pan-Tilt-Zoom) Cameras:
Camera Selection Criteria:
Budget Camera Mistake: Using action cameras or webcams for professional events. These devices lack manual controls, produce inconsistent image quality, and often overheat during extended streaming sessions.
How Do You Set Up Multiple Camera Angles for Live Streaming
Multiple camera live streaming requires video switching equipment, synchronized camera settings, and trained operators to manage smooth transitions between angles during the event. Plan camera positions during venue site surveys and test switching operations during rehearsals.
Multi-Camera Setup Components:
Strategic Camera Positioning:
Video Switching Best Practices:
Camera Synchronization Requirements:
Crew Coordination Protocol:
Assign specific roles including camera operators, video switcher operator, audio technician, and technical director. Use clear communication protocols and hand signals as backup when headset systems fail.
Technical Complexity Warning: Multi-camera productions require significantly more setup time, equipment, and experienced crew members. Budget additional 4-6 hours for equipment setup and testing compared to single-camera operations.
Common Mistakes People Make When Setting Up Live Streams
The most frequent live streaming mistakes include inadequate internet bandwidth testing, poor audio quality planning, insufficient backup equipment preparation, and unrealistic timeline expectations for technical setup. These errors often compound during events, creating cascading technical failures.
Critical Setup Mistakes:
Internet and Connectivity Errors:
Audio Quality Mistakes:
Equipment and Planning Errors:
Platform and Streaming Mistakes:
Timeline and Communication Errors:
Prevention Strategy: Create detailed checklists for each setup phase and assign specific crew members to verify completion. Professional event production teams use systematic approaches that prevent these common mistakes through experience and proven protocols.
How Do You Embed a Live Stream on Your Website
Embed live streams on websites using platform-provided iframe codes, custom video players, or third-party streaming services that generate embeddable widgets. Test embedded players across different devices and browsers before promoting the stream link.
Platform-Specific Embedding Methods:
YouTube Live Embedding:
Facebook Live Embedding:
Custom Streaming Solutions:
Technical Implementation Steps:
Website Performance Considerations:
Backup Embedding Strategy: Provide multiple viewing options including direct platform links, embedded players, and mobile app alternatives to ensure audience access regardless of technical issues with primary embedding method.
What Should You Do If Your Internet Cuts Out During a Live Stream
When internet connectivity fails during live streaming, immediately switch to backup connections, inform the audience about technical difficulties, and continue recording locally while working to restore streaming capability. Prepare specific protocols and assign crew responsibilities for internet failure scenarios.
Immediate Response Protocol:
First 30 Seconds:
1-5 Minutes:
Extended Outage Response:
Prevention and Backup Systems:
Audience Communication Strategy:
Post-Incident Protocol: Document internet failure causes and duration, review backup system performance, and improve redundancy planning for future events. Consider upgrading to professional-grade internet solutions for mission-critical streams.
Frequently Asked Questions
How far in advance should I start planning live event video setup?
Start planning 4-6 weeks before the event date for complex productions or 2-3 weeks for simple setups. This timeline allows equipment sourcing, crew scheduling, venue coordination, and adequate testing time.
Can I use my smartphone for professional live streaming?
Smartphones work for basic streaming but lack professional features like clean HDMI output, manual exposure controls, and reliable external audio inputs. Use smartphones only for backup streaming or informal events with limited quality expectations.
What happens if my streaming platform goes down during the event?
Configure multiple streaming destinations simultaneously using services like Restream or OBS Studio. If your primary platform fails, audiences can access backup streams on alternative platforms without interruption.
How many crew members do I need for live event streaming?
Single-camera setups require 1-2 people minimum. Multi-camera productions need 3-5 crew members including camera operators, audio technician, video switcher operator, and technical director for smooth operation.
Should I provide a backup recording if the live stream fails?
Always record backup footage locally on multiple devices. This ensures content preservation if streaming fails and provides high-quality source material for post-event editing and distribution.
How do I handle copyright issues with background music during live streams?
Use royalty-free music or obtain proper licensing for copyrighted content. Most streaming platforms automatically detect copyrighted music and may mute audio or restrict stream distribution.
What's the best time delay setting for live streams?
Use 10-30 second delays for most events to allow content moderation and technical adjustments. Longer delays reduce audience engagement but provide more time to address technical issues.
How do I manage audience interaction during live streams?
Assign dedicated crew member to monitor chat, comments, and questions. Use moderation tools to filter inappropriate content and prepare standard responses for common technical questions.
Can I stream to multiple social media platforms simultaneously?
Yes, use multi-streaming services or configure OBS Studio with multiple stream keys. This approach requires higher internet bandwidth but maximizes audience reach across different platforms.
What should I do about lighting if the venue is too dark?
Bring portable LED lighting panels or rent professional lighting equipment. Position lights to eliminate shadows on speakers' faces and ensure cameras can maintain proper exposure without excessive noise.
How do I test audio quality before the event starts?
Conduct sound checks with actual speakers using event microphones. Test wireless microphone range, battery life, and potential interference sources. Record audio samples for quality verification.
What backup power solutions do I need for live streaming?
Use uninterruptible power supplies (UPS) for critical equipment and portable battery packs for cameras. Identify venue power sources and bring extension cords with surge protection for all equipment.
Need Professional AV Support for Your Live Event?
Planning a live event video setup can be complex, especially for multi-camera productions or high-stakes corporate events. If you need experienced AV technicians, video production crews, or complete event production support, AV Labor Source connects you with skilled professionals nationwide.
Our network includes certified camera operators, audio engineers, lighting technicians, and video production specialists who understand the technical requirements for successful live streaming. Whether you need a single technician or a complete production crew, we provide qualified professionals for events of any size.
Get expert help with your next live event. Contact our team to discuss your technical requirements and staffing needs.
Conclusion
Creating a comprehensive Live Event Video Setup Checklist for Event Planners requires systematic planning, proper equipment selection, and experienced technical crews. Success depends on thorough testing, backup systems, and clear communication protocols that prevent common technical failures.
Start planning 4-6 weeks in advance, invest in reliable internet connectivity, and prioritize audio quality over video effects. Whether you choose DIY approaches or professional crews, systematic preparation and contingency planning ensure successful live streaming that engages audiences and achieves event objectives.
Remember that technical complexity increases exponentially with multi-camera setups, so budget adequate time and resources for testing and crew coordination. The investment in proper planning and professional support often prevents costly technical failures during critical business presentations.
Key Takeaways
- Test all equipment and internet connectivity at least 24 hours before your event starts
- Ensure upload speeds of at least 5-10 Mbps for HD streaming with dedicated bandwidth
- Use professional cameras with clean HDMI output and external audio sources for quality
- Assign dedicated technical staff or hire experienced AV professionals for complex setups
- Create backup plans for internet failures, equipment malfunctions, and audio issues
- Choose streaming platforms based on your audience reach and interactive features needed
- Budget $2,000-$15,000+ depending on production complexity and professional crew requirements
- Position cameras strategically with proper lighting to avoid shadows and backlighting issues
What Equipment Do You Need to Live Stream an Event
Essential live streaming equipment includes cameras with clean HDMI output, audio capture devices, encoding hardware or software, reliable internet connection, and streaming platform access. The complexity of your setup depends on production quality goals and audience size expectations.
Basic Single-Camera Setup:
- Camera with clean HDMI output (DSLR, mirrorless, or camcorder)
- Video capture device or encoder
- Laptop or desktop computer with streaming software
- External microphone or audio mixer
- Tripod and basic lighting equipment
- Ethernet cable for wired internet connection
Multi-Camera Professional Setup:
- Multiple cameras with matching specifications
- Video switcher or mixing console
- Professional audio equipment and wireless microphones
- Dedicated streaming encoder or production computer
- Backup recording devices
- Professional lighting kit with multiple sources
Choose a single-camera setup if your budget is under $3,000 and the event has simple staging. Opt for multi-camera production when budget exceeds $8,000 and you need dynamic coverage of speakers, audience reactions, and stage activities.
Common Equipment Mistake: Using consumer webcams or built-in laptop cameras for professional events. These devices lack manual controls, produce poor image quality in varying lighting conditions, and often have unreliable audio capture that creates viewer frustration.
How Do You Set Up Live Video Streaming for a Conference
Conference live streaming setup requires positioning cameras to capture speakers and presentation screens, connecting audio directly from the venue's sound system, and configuring streaming software with proper encoding settings. Start setup and testing at least 4 hours before the conference begins.
Step-by-Step Conference Setup Process:
- Survey the venue - Identify power outlets, internet access points, and optimal camera positions
- Position primary camera - Place 10-15 feet from the stage at speaker eye level
- Set up secondary cameras - Position for wide shots and audience reactions if budget allows
- Connect audio sources - Use venue's audio feed or place wireless microphones on speakers
- Configure streaming software - Set resolution, bitrate, and platform-specific settings
- Test all connections - Verify video, audio, and internet stability for 30+ minutes
- Create backup systems - Set up recording devices and secondary internet connections
Audio Integration Best Practices:
- Request audio feed directly from venue's mixing board
- Use wireless lavalier microphones as backup audio source
- Monitor audio levels continuously during the event
- Position audio technician near mixing equipment
Work with professional AV specialists for conferences with 200+ attendees or complex technical requirements. They bring specialized equipment, experienced crews, and proven troubleshooting protocols that prevent costly technical failures.
What's the Difference Between Streaming to YouTube vs Facebook Live
YouTube Live offers better video quality, longer stream duration, and superior discoverability, while Facebook Live provides easier audience engagement tools and better integration with social media marketing campaigns. Choose based on where your target audience spends time and your content distribution goals.
YouTube Live Advantages:
- Supports up to 4K resolution streaming
- No time limits for verified accounts
- Better search engine optimization and discoverability
- Automatic video archiving and editing tools
- More stable streaming infrastructure
- Professional analytics and monetization options
Facebook Live Advantages:
- Immediate notifications to followers and page fans
- Built-in audience interaction features (reactions, comments)
- Easy cross-posting to Instagram and other Meta platforms
- Better organic reach for business pages
- Integrated event promotion and RSVP features
- Simpler setup process for non-technical users
Multi-Platform Streaming: Use services like Restream or OBS Studio with multiple stream keys to broadcast simultaneously to YouTube, Facebook, LinkedIn, and other platforms. This approach maximizes audience reach but requires higher internet bandwidth and more powerful encoding equipment.
Platform Selection Rule: Choose YouTube for educational content, product launches, and evergreen events that benefit from long-term discoverability. Select Facebook for community events, behind-the-scenes content, and campaigns focused on immediate audience engagement and social sharing.
How Much Does It Cost to Live Stream an Event
Live streaming costs range from $500-$2,000 for basic DIY setups to $5,000-$25,000+ for professional multi-camera productions with dedicated crews. Equipment rental, staffing, and internet connectivity represent the largest expense categories.
Budget Breakdown by Production Level:
Production Level | Equipment Cost | Staffing Cost | Total Range |
Basic (1 camera) | $300-$800 | $200-$600 | $500-$1,400 |
Standard (2-3 cameras) | $1,200-$3,000 | $800-$2,000 | $2,000-$5,000 |
Professional (4+ cameras) | $3,500-$8,000 | $2,500-$7,000 | $6,000-$15,000 |
Broadcast Quality | $8,000-$20,000 | $5,000-$15,000 | $13,000-$35,000 |
Additional Cost Factors:
- Internet connectivity upgrades: $200-$1,500
- Backup equipment rental: $300-$800
- Travel and accommodation for crew: $500-$3,000
- Post-production editing: $500-$2,500
- Platform hosting and bandwidth: $50-$500
Cost-Saving Strategy: Rent equipment locally and hire experienced AV technicians from the event city rather than flying in crews from distant locations. This approach reduces travel expenses while ensuring technical support arrives familiar with local venues and suppliers.
Best Practices for Live Event Video Setup
Successful live event video setup requires systematic equipment testing, redundant backup systems, clear crew communication protocols, and contingency plans for common technical failures. Start preparation at least one week before the event date.
Pre-Event Preparation Checklist:
- Conduct venue site survey 2-4 weeks in advance
- Test all equipment in controlled environment
- Create detailed technical rundown and crew assignments
- Establish primary and backup internet connections
- Prepare emergency contact list for technical support
- Schedule rehearsal with speakers and key personnel
Camera Positioning Best Practices:
- Position primary camera at audience eye level, not below looking up
- Avoid placing cameras directly under bright stage lights
- Ensure clear sight lines without audience member obstructions
- Use wide shots for context and close-ups for speaker engagement
- Position cameras to avoid distracting background movement
Audio Quality Priorities:
- Always use external microphones rather than camera-built audio
- Monitor audio levels continuously with dedicated personnel
- Create backup audio recordings on separate devices
- Test wireless microphone range and battery life before event
- Position audio mixing station away from audience noise
Lighting Considerations:
- Avoid backlighting speakers against bright windows or screens
- Use additional lighting to eliminate harsh shadows on faces
- Test camera exposure settings under actual event lighting conditions
- Prepare portable lighting equipment for unexpected dark areas
Critical Setup Mistake: Relying solely on venue Wi-Fi for internet connectivity. Always arrange dedicated wired internet or cellular backup connections, as shared Wi-Fi networks often become unstable when hundreds of attendees connect simultaneously.
How Do You Test Your Live Stream Setup Before the Event
Test your live stream setup by conducting full dress rehearsals with actual speakers, running equipment for extended periods under event conditions, and verifying backup systems function properly. Complete testing at least 24 hours before the event begins.
Comprehensive Testing Protocol:
Technical Systems Test (2-3 days before):
- Stream test content for 2+ hours continuously
- Verify all camera angles and switching capabilities
- Test audio levels with speakers using actual microphones
- Confirm internet stability during peak usage hours
- Validate streaming platform settings and access permissions
Full Dress Rehearsal (1 day before):
- Run complete event timeline with speakers present
- Test presentation screen capture and switching
- Verify audience interaction features work properly
- Practice emergency procedures with full crew
- Record backup footage to test equipment functionality
Day-of-Event Testing:
- Arrive 4+ hours early for equipment setup
- Test all systems immediately upon arrival
- Conduct 30-minute continuous stream test
- Verify backup internet and equipment activation
- Confirm crew communication systems work properly
Testing Documentation:
- Record equipment serial numbers and settings
- Document successful configurations for future events
- Create troubleshooting checklist based on test results
- Note venue-specific technical limitations or requirements
Red Flag Indicators: If video drops frames during testing, audio has noticeable delays, or internet speed tests show inconsistent results, postpone the event or arrange professional technical support immediately. These issues worsen under actual event stress conditions.
What Internet Speed Do You Need for Live Streaming
Live streaming requires upload speeds of at least 5-10 Mbps for HD quality, with recommended speeds of 15-25 Mbps for professional productions and backup bandwidth allocation. Download speeds matter less than consistent, dedicated upload capacity.
Internet Speed Requirements by Quality:
- 720p HD streaming: 3-5 Mbps upload minimum, 7-10 Mbps recommended
- 1080p Full HD: 5-8 Mbps upload minimum, 12-15 Mbps recommended
- 4K Ultra HD: 15-25 Mbps upload minimum, 35-50 Mbps recommended
- Multi-platform streaming: Add 50-75% additional bandwidth per extra platform
Connection Type Priorities:
- Dedicated wired ethernet - Most reliable, lowest latency
- Cellular bonding devices - Combines multiple carrier signals
- Venue Wi-Fi with guaranteed bandwidth - Requires written SLA
- Mobile hotspots - Backup only, not primary connection
Bandwidth Testing Protocol:
- Test upload speeds at different times during venue setup
- Run continuous speed tests during rehearsal periods
- Verify connection stability during venue's peak usage hours
- Document speed variations and plan accordingly
Internet Backup Strategy:
Always arrange secondary internet connections from different providers or cellular networks. Configure streaming software to automatically switch connections if primary bandwidth drops below acceptable levels.
Venue Internet Mistake: Assuming venue "high-speed internet" meets streaming requirements. Many venues offer fast download speeds but severely limited upload capacity that cannot support live streaming. Always request specific upload speed guarantees in writing before booking.
How Do You Handle Audio Issues During a Live Stream
Address audio issues during live streams by monitoring levels continuously, having backup microphones ready, and training crew members to make quick adjustments without interrupting the event flow. Assign dedicated audio personnel for events longer than 30 minutes.
Real-Time Audio Problem Solutions:
Microphone Feedback:
- Lower microphone gain immediately at mixing board
- Move speakers away from monitor speakers or amplifiers
- Switch to backup microphone if feedback persists
- Use directional microphones instead of omnidirectional types
Low Audio Levels:
- Increase gain gradually while monitoring for distortion
- Move wireless microphone receivers closer to transmitters
- Switch to wired microphone connections if signal strength is weak
- Boost audio levels in streaming software as secondary option
Audio Delay or Sync Issues:
- Adjust audio delay settings in streaming software
- Reset audio input connections and restart if necessary
- Use direct audio feed from mixing board rather than camera audio
- Switch to backup audio source while troubleshooting primary connection
Background Noise Problems:
- Use noise gates to eliminate ambient sound between speaking
- Position microphones closer to speakers' mouths
- Switch to directional microphones that reject side noise
- Move audio mixing position away from audience areas
Emergency Audio Protocols:
- Keep backup wireless microphones with fresh batteries ready
- Train speakers to project voice if microphone systems fail
- Prepare handheld microphones as immediate backup option
- Assign crew member to monitor chat for audio quality feedback
Audio Crew Communication: Use headset communication systems so audio technicians can coordinate adjustments without disrupting the event. Professional audio engineers bring specialized equipment and experience managing complex audio challenges during live events.
Should You Hire a Professional Videographer or Do It Yourself
Hire professional videographers for events with budgets over $5,000, complex technical requirements, or high-stakes presentations where technical failures create significant business consequences. Handle simple, single-camera streams internally when budget constraints exist and technical complexity remains minimal.
When to Hire Professionals:
- Multi-camera productions requiring live switching
- Events with 200+ attendees or high-profile speakers
- Corporate launches, product announcements, or investor presentations
- Venues with complex technical infrastructure or restrictions
- International events where equipment failure creates major problems
- Productions requiring simultaneous streaming to multiple platforms
DIY Approach Works When:
- Budget limitations prevent professional hiring
- Single-camera setup meets production quality needs
- Internal team has previous live streaming experience
- Event format is simple with minimal technical switching
- Backup plans exist if technical issues occur
- Audience expectations align with available production quality
Professional Videographer Benefits:
- Specialized equipment including backup systems
- Experience troubleshooting technical problems quickly
- Knowledge of venue-specific technical requirements
- Crew coordination and communication systems
- Post-production editing and content delivery services
Cost-Benefit Analysis:
Compare professional videographer costs against potential revenue loss from technical failures. A $3,000 professional crew investment often prevents $10,000+ losses from failed product launches or missed sales opportunities during critical presentations.
Hybrid Solution: Hire experienced AV technicians for technical setup and monitoring while maintaining internal control over content and presentation flow. This approach reduces costs while ensuring professional technical execution.
What's the Best Camera for Live Streaming Events
Professional camcorders with clean HDMI output, manual exposure controls, and external audio inputs provide the best live streaming performance for events. DSLR and mirrorless cameras offer superior image quality but require additional accessories for extended operation.
Recommended Camera Categories:
Professional Camcorders:
- Sony PXW-Z150, Canon XA40, Panasonic AG-CX10
- Built-in zoom lenses with image stabilization
- Extended battery life and continuous recording capability
- Professional audio inputs and manual controls
- Price range: $1,500-$4,000
DSLR/Mirrorless Cameras:
- Canon EOS R5, Sony A7S III, Panasonic GH5
- Superior low-light performance and image quality
- Requires dummy batteries for extended operation
- Limited continuous recording time without overheating
- Price range: $1,200-$3,500 (body only)
PTZ (Pan-Tilt-Zoom) Cameras:
- Remote-controlled positioning and zoom capabilities
- Ideal for unmanned camera positions
- Professional models offer broadcast-quality output
- Higher cost but reduced crew requirements
- Price range: $2,000-$8,000
Camera Selection Criteria:
- Clean HDMI output - Essential for streaming without recording overlays
- Manual exposure controls - Prevents automatic adjustments during streaming
- External audio inputs - Allows professional microphone connections
- Low-light performance - Handles varying venue lighting conditions
- Reliable autofocus - Maintains sharp focus during speaker movement
Budget Camera Mistake: Using action cameras or webcams for professional events. These devices lack manual controls, produce inconsistent image quality, and often overheat during extended streaming sessions.
How Do You Set Up Multiple Camera Angles for Live Streaming
Multiple camera live streaming requires video switching equipment, synchronized camera settings, and trained operators to manage smooth transitions between angles during the event. Plan camera positions during venue site surveys and test switching operations during rehearsals.
Multi-Camera Setup Components:
- Video switcher or mixing console (hardware or software-based)
- Multiple cameras with matching specifications and settings
- Long HDMI or SDI cables for camera connections
- Monitor displays for camera operators and director
- Communication headsets for crew coordination
- Dedicated streaming encoder or production computer
Strategic Camera Positioning:
- Primary camera - Center position focused on speakers at podium
- Wide shot camera - Captures full stage and audience context
- Close-up camera - Tight shots of speaker faces and expressions
- Presentation camera - Dedicated to screens, slides, or demonstration areas
- Audience camera - Reaction shots and Q&A session coverage
Video Switching Best Practices:
- Cut between cameras during natural speaking pauses
- Use wide shots during speaker transitions or technical issues
- Switch to presentation camera when speakers reference slides
- Avoid rapid cutting that creates viewer disorientation
- Prepare standard shots for common event segments
Camera Synchronization Requirements:
- Match white balance settings across all cameras
- Use identical exposure and color profiles
- Synchronize recording start times for post-production backup
- Test switching delays and adjust timing accordingly
Crew Coordination Protocol:
Assign specific roles including camera operators, video switcher operator, audio technician, and technical director. Use clear communication protocols and hand signals as backup when headset systems fail.
Technical Complexity Warning: Multi-camera productions require significantly more setup time, equipment, and experienced crew members. Budget additional 4-6 hours for equipment setup and testing compared to single-camera operations.
Common Mistakes People Make When Setting Up Live Streams
The most frequent live streaming mistakes include inadequate internet bandwidth testing, poor audio quality planning, insufficient backup equipment preparation, and unrealistic timeline expectations for technical setup. These errors often compound during events, creating cascading technical failures.
Critical Setup Mistakes:
Internet and Connectivity Errors:
- Relying on venue Wi-Fi without speed testing or guarantees
- Not arranging backup internet connections from different providers
- Failing to test upload speeds during venue's peak usage periods
- Assuming download speeds indicate adequate upload capacity
Audio Quality Mistakes:
- Using camera-built microphones instead of external audio sources
- Not testing wireless microphone range and interference patterns
- Failing to monitor audio levels continuously during events
- Skipping backup audio recording on separate devices
Equipment and Planning Errors:
- Insufficient backup equipment for critical components
- Not testing equipment under actual event lighting conditions
- Underestimating setup time requirements by 50-75%
- Failing to assign dedicated technical crew members
Platform and Streaming Mistakes:
- Not testing streaming platform settings and permissions in advance
- Choosing inappropriate streaming quality settings for available bandwidth
- Failing to configure backup streaming destinations
- Not preparing contingency plans for platform outages or restrictions
Timeline and Communication Errors:
- Arriving less than 4 hours before event start for complex setups
- Not conducting full dress rehearsals with speakers and crew
- Inadequate crew communication systems and emergency protocols
- Failing to document successful configurations for future reference
Prevention Strategy: Create detailed checklists for each setup phase and assign specific crew members to verify completion. Professional event production teams use systematic approaches that prevent these common mistakes through experience and proven protocols.
How Do You Embed a Live Stream on Your Website
Embed live streams on websites using platform-provided iframe codes, custom video players, or third-party streaming services that generate embeddable widgets. Test embedded players across different devices and browsers before promoting the stream link.
Platform-Specific Embedding Methods:
YouTube Live Embedding:
- Copy embed code from YouTube Live stream page
- Customize player size and autoplay settings
- Use YouTube API for advanced player controls
- Embed code updates automatically when stream goes live
Facebook Live Embedding:
- Generate embed code from Facebook Live producer dashboard
- Configure player appearance and interaction features
- Note: Facebook embeds may require user login for some content
- Test embed functionality on different website platforms
Custom Streaming Solutions:
- Use services like Vimeo Live, Wistia, or JW Player for branded players
- Configure custom player colors, logos, and control layouts
- Implement advanced features like chapter markers or interactive elements
- Higher cost but better brand integration and analytics
Technical Implementation Steps:
- Generate embed code from streaming platform
- Add iframe code to website HTML or content management system
- Configure responsive sizing for mobile device compatibility
- Test player functionality across browsers and devices
- Set up analytics tracking for viewer engagement data
Website Performance Considerations:
- Embedded players can slow page loading times
- Use lazy loading techniques to improve initial page speed
- Consider dedicated landing pages for live stream content
- Optimize page elements around embedded player for better user experience
Backup Embedding Strategy: Provide multiple viewing options including direct platform links, embedded players, and mobile app alternatives to ensure audience access regardless of technical issues with primary embedding method.
What Should You Do If Your Internet Cuts Out During a Live Stream
When internet connectivity fails during live streaming, immediately switch to backup connections, inform the audience about technical difficulties, and continue recording locally while working to restore streaming capability. Prepare specific protocols and assign crew responsibilities for internet failure scenarios.
Immediate Response Protocol:
First 30 Seconds:
- Switch to backup internet connection (cellular, secondary provider)
- Announce technical difficulties to live audience if possible
- Continue local recording on all cameras and audio devices
- Assign crew member to work on primary connection restoration
1-5 Minutes:
- Attempt to reconnect streaming software to platforms
- Use mobile hotspot or cellular bonding device as temporary solution
- Post updates on social media explaining technical issues
- Consider moving to different venue location with better connectivity
Extended Outage Response:
- Switch event to "recording only" mode and notify audience
- Use cellular data to post regular updates about restoration timeline
- Consider rescheduling live portions if internet cannot be restored
- Prepare to upload recorded content immediately after connectivity returns
Prevention and Backup Systems:
- Arrange multiple internet connections from different providers
- Use cellular bonding devices that combine multiple carrier signals
- Set up automatic failover systems in streaming software
- Prepare mobile streaming setup as complete backup solution
Audience Communication Strategy:
- Pre-write social media posts explaining potential technical issues
- Assign crew member to manage audience communication during outages
- Provide alternative viewing options or rescheduled stream times
- Follow up with recorded content delivery timeline and access information
Post-Incident Protocol: Document internet failure causes and duration, review backup system performance, and improve redundancy planning for future events. Consider upgrading to professional-grade internet solutions for mission-critical streams.
Frequently Asked Questions
How far in advance should I start planning live event video setup?
Start planning 4-6 weeks before the event date for complex productions or 2-3 weeks for simple setups. This timeline allows equipment sourcing, crew scheduling, venue coordination, and adequate testing time.
Can I use my smartphone for professional live streaming?
Smartphones work for basic streaming but lack professional features like clean HDMI output, manual exposure controls, and reliable external audio inputs. Use smartphones only for backup streaming or informal events with limited quality expectations.
What happens if my streaming platform goes down during the event?
Configure multiple streaming destinations simultaneously using services like Restream or OBS Studio. If your primary platform fails, audiences can access backup streams on alternative platforms without interruption.
How many crew members do I need for live event streaming?
Single-camera setups require 1-2 people minimum. Multi-camera productions need 3-5 crew members including camera operators, audio technician, video switcher operator, and technical director for smooth operation.
Should I provide a backup recording if the live stream fails?
Always record backup footage locally on multiple devices. This ensures content preservation if streaming fails and provides high-quality source material for post-event editing and distribution.
How do I handle copyright issues with background music during live streams?
Use royalty-free music or obtain proper licensing for copyrighted content. Most streaming platforms automatically detect copyrighted music and may mute audio or restrict stream distribution.
What's the best time delay setting for live streams?
Use 10-30 second delays for most events to allow content moderation and technical adjustments. Longer delays reduce audience engagement but provide more time to address technical issues.
How do I manage audience interaction during live streams?
Assign dedicated crew member to monitor chat, comments, and questions. Use moderation tools to filter inappropriate content and prepare standard responses for common technical questions.
Can I stream to multiple social media platforms simultaneously?
Yes, use multi-streaming services or configure OBS Studio with multiple stream keys. This approach requires higher internet bandwidth but maximizes audience reach across different platforms.
What should I do about lighting if the venue is too dark?
Bring portable LED lighting panels or rent professional lighting equipment. Position lights to eliminate shadows on speakers' faces and ensure cameras can maintain proper exposure without excessive noise.
How do I test audio quality before the event starts?
Conduct sound checks with actual speakers using event microphones. Test wireless microphone range, battery life, and potential interference sources. Record audio samples for quality verification.
What backup power solutions do I need for live streaming?
Use uninterruptible power supplies (UPS) for critical equipment and portable battery packs for cameras. Identify venue power sources and bring extension cords with surge protection for all equipment.
Need Professional AV Support for Your Live Event?
Planning a live event video setup can be complex, especially for multi-camera productions or high-stakes corporate events. If you need experienced AV technicians, video production crews, or complete event production support, AV Labor Source connects you with skilled professionals nationwide.
Our network includes certified camera operators, audio engineers, lighting technicians, and video production specialists who understand the technical requirements for successful live streaming. Whether you need a single technician or a complete production crew, we provide qualified professionals for events of any size.
Get expert help with your next live event. Contact our team to discuss your technical requirements and staffing needs.
Conclusion
Creating a comprehensive Live Event Video Setup Checklist for Event Planners requires systematic planning, proper equipment selection, and experienced technical crews. Success depends on thorough testing, backup systems, and clear communication protocols that prevent common technical failures.
Start planning 4-6 weeks in advance, invest in reliable internet connectivity, and prioritize audio quality over video effects. Whether you choose DIY approaches or professional crews, systematic preparation and contingency planning ensure successful live streaming that engages audiences and achieves event objectives.
Remember that technical complexity increases exponentially with multi-camera setups, so budget adequate time and resources for testing and crew coordination. The investment in proper planning and professional support often prevents costly technical failures during critical business presentations.
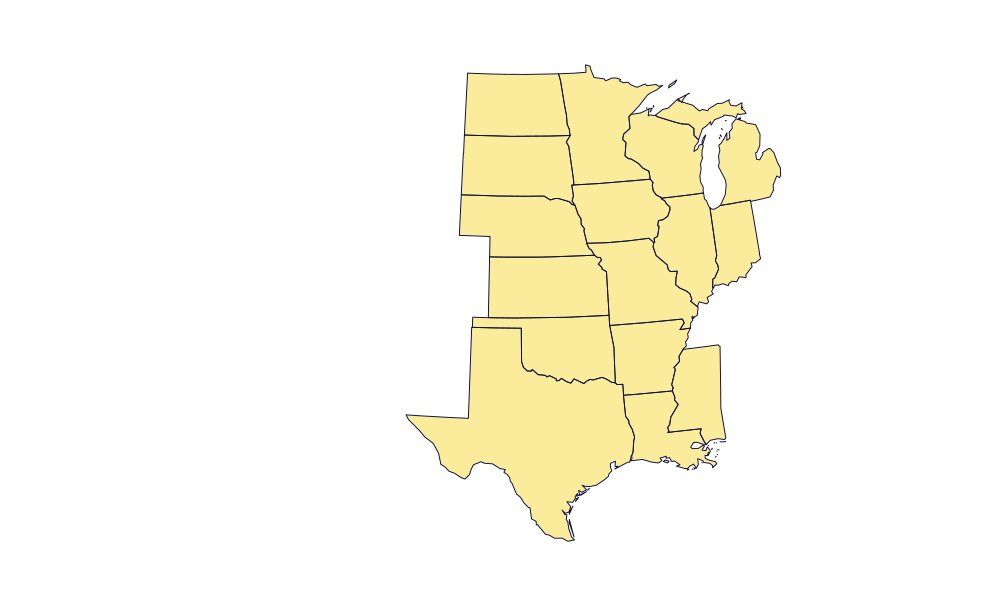
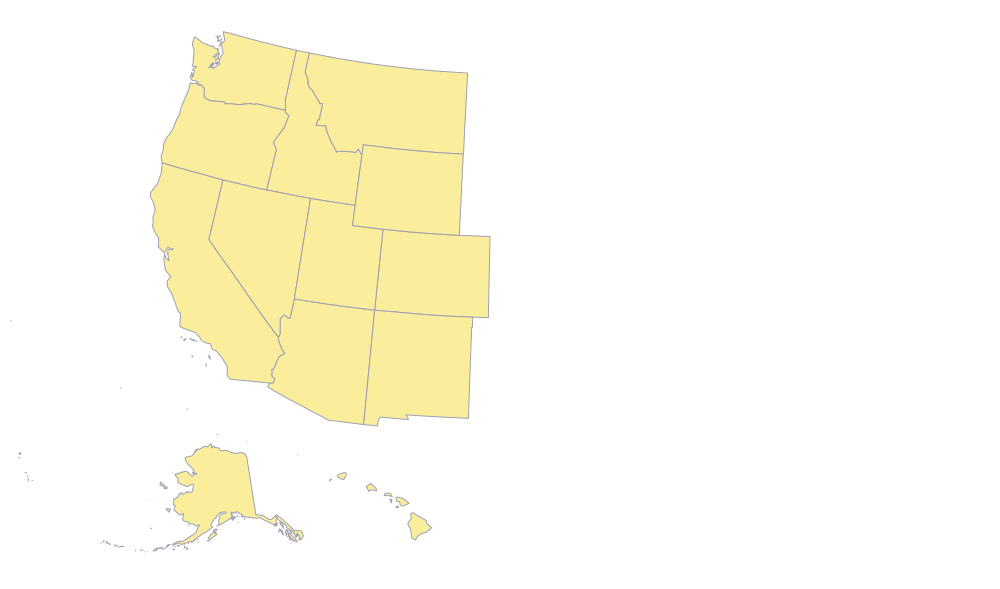
AVLS Nationwide Services
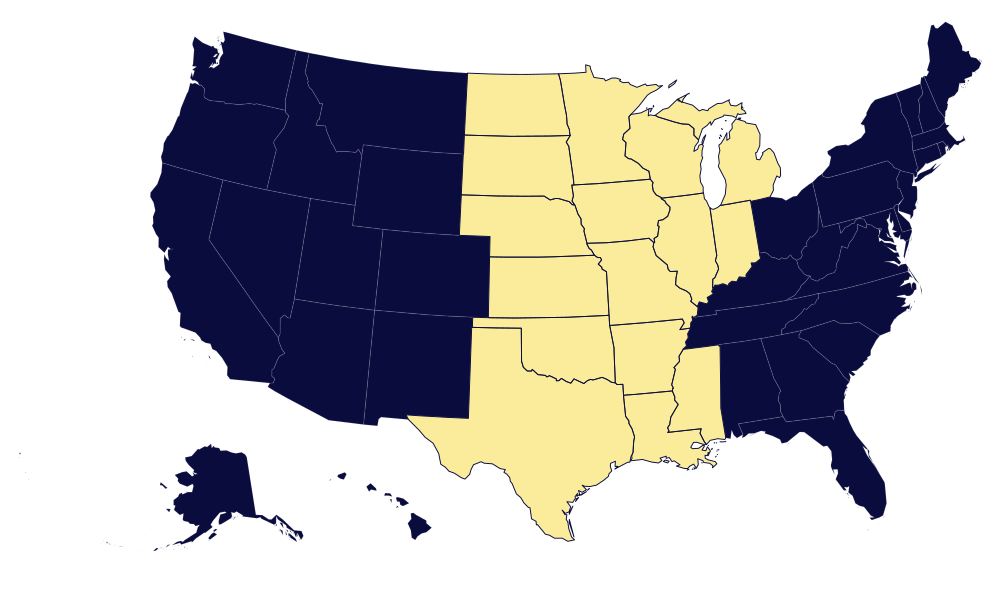
Central States
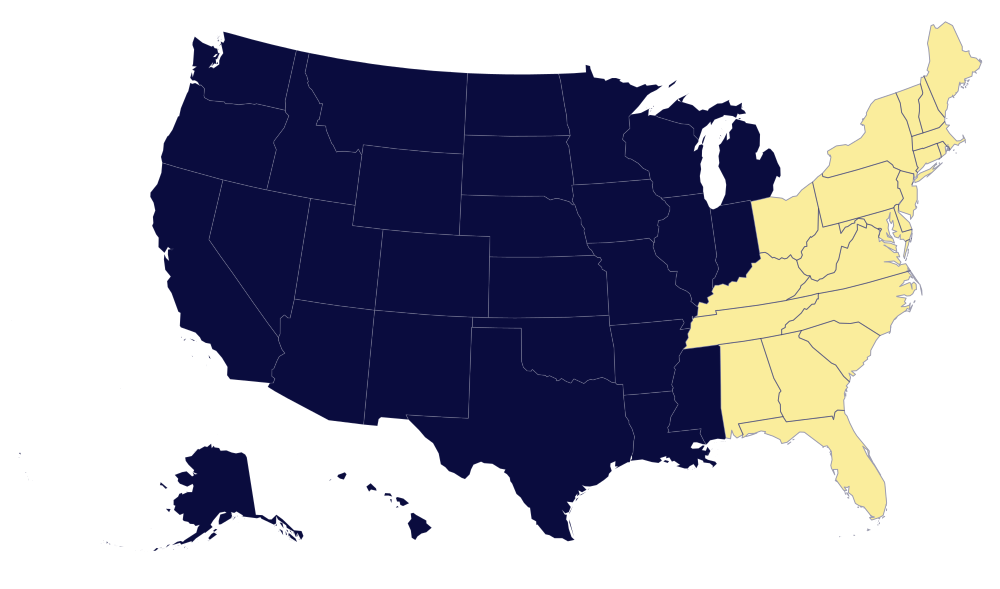
East Coast
*COMING SOON
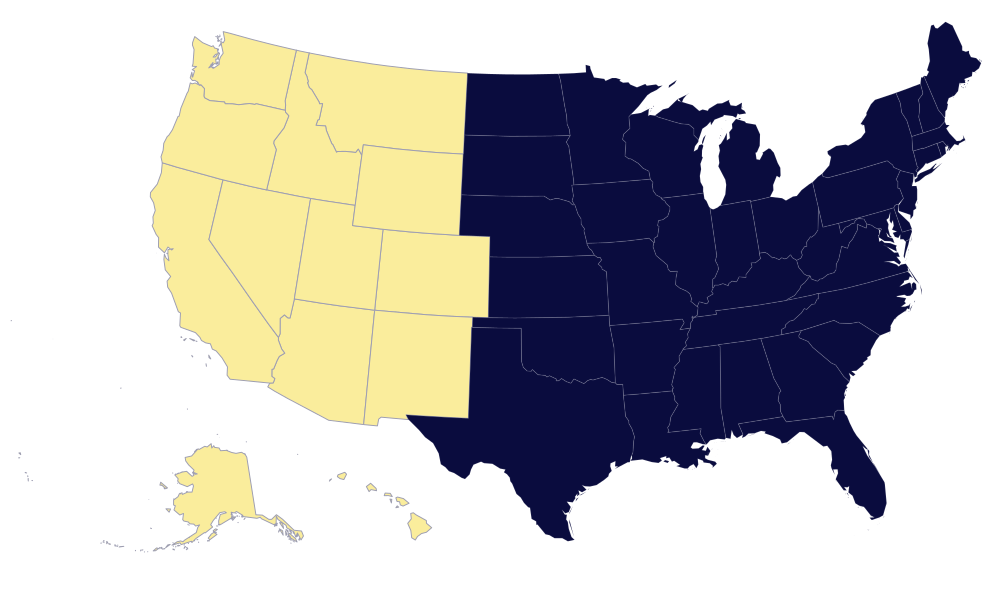
West Coast

*COMING SOON
East Coast
Central States
West Coast
AVLS Nationwide Services
CONTACT US
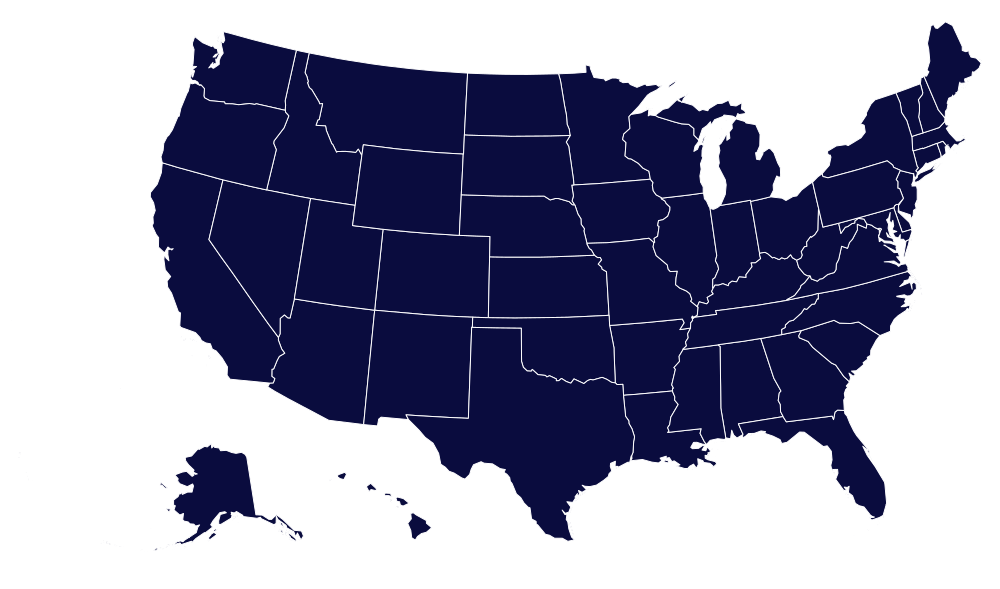
When your event matters, trust your audio visual labor needs to AV Labor Source.
AVLS operate and has proven pool of AV technicians in major cities US Nationwide, such as Las Vegas, Los Angeles, Orlando, Dallas, San Antonio, Austin, Houston, Washington DC, Atlanta, New Orleans, Tennessee and more.
Please complete the form below and we will respond to you as soon as possible. We are available 24 hours a day to assist with your needs. We look forward to showing you what we can do toward the success of your next event.
AVLS operate and has proven pool of AV technicians in major cities US Nationwide, such as Las Vegas, Los Angeles, Orlando, Dallas, San Antonio, Austin, Houston, Washington DC, Atlanta, New Orleans, Tennessee and more.
Please complete the form below and we will respond to you as soon as possible. We are available 24 hours a day to assist with your needs. We look forward to showing you what we can do toward the success of your next event.
EVENT INFORMATION
