





July 15, 2026
How to Plan Lighting for a General Session
Quick Answer: Planning lighting for a general session requires balancing ambient lighting for audience comfort (3,000K-4,000K color temperature), focused presentation lighting to eliminate glare and shadows, and considering the venue's ceiling height and natural light sources. Start with a lighting survey 2-4 weeks before the event, budget $500-$5,000 depending on venue size, and always conduct a full lighting test 24-48 hours prior to the event.
Key Takeaways:
What Is General Session Lighting and Why Does It Matter
General session lighting creates uniform, comfortable illumination for large conference rooms or auditoriums where audiences gather for presentations, keynotes, or corporate meetings. Unlike theatrical stage lighting that emphasizes drama and mood, general session lighting prioritizes visibility, audience comfort, and presenter clarity.
Proper lighting directly impacts audience engagement and retention. Studies show that inadequate lighting causes eye strain within 30 minutes, leading to decreased attention and early departures. For corporate events where information transfer is critical, lighting becomes a business necessity rather than an aesthetic choice.
Key differences from other lighting types:
The investment in proper lighting pays dividends through improved audience satisfaction scores and better event outcomes. Poor lighting ranks among the top three complaints at corporate events, making it a critical success factor for event planners.
How Do You Plan Lighting for a Large Conference Room
Planning lighting for a large conference room starts with a comprehensive venue assessment and lighting survey conducted 2-4 weeks before your event. Measure the room dimensions, ceiling height, existing fixtures, and natural light sources to determine your lighting requirements and equipment needs.
Step-by-step planning process:
Room size considerations:
Choose fixtures based on throw distance and beam angle. Rooms with 12-foot ceilings need different equipment than 20-foot ceiling venues. Always account for HVAC systems, structural elements, and fire safety requirements when positioning equipment.
What's the Difference Between General Session Lighting and Stage Lighting
General session lighting and stage lighting serve fundamentally different purposes and require distinct approaches. General session lighting prioritizes uniform illumination and audience comfort, while stage lighting creates mood, drama, and visual interest through contrast and color.
General session lighting characteristics:
Stage lighting characteristics:
Equipment differences:
General sessions use LED panels, softboxes, and flood lights for broad, even coverage. Stage lighting employs spotlights, moving heads, and colored gels for dynamic effects. The control systems also differ - general sessions need simple dimming controls, while stage lighting requires complex programming boards.
Budget implications:
General session lighting typically costs 60-70% less than stage lighting due to simpler equipment requirements and shorter setup times. A general session might need $1,000-$3,000 in lighting, while comparable stage lighting could cost $5,000-$15,000.
For corporate events, resist the temptation to add unnecessary stage lighting effects. Attendees came to absorb information, not be entertained by light shows. Focus your budget on creating comfortable, functional illumination that supports your content delivery goals.
How Much Does Professional Event Lighting Cost
Professional event lighting costs vary significantly based on venue size, equipment requirements, and labor needs. For general sessions, expect to budget $500-$5,000 for most corporate events, with additional costs for specialized requirements or complex venue configurations.
Typical cost breakdown:
Cost factors that increase pricing:
Regional pricing variations:
Major metropolitan areas like New York, Los Angeles, and Chicago typically cost 25-40% more than secondary markets. Las Vegas and Orlando, despite being major event destinations, often offer competitive pricing due to high supplier competition.
Budget-saving strategies:
Work with venues that include basic lighting packages, schedule events during off-peak times for better rates, and consider hiring experienced AV technicians who can maximize existing venue lighting rather than bringing extensive additional equipment.
For events with budgets under $1,000, focus on supplementing existing venue lighting with strategic LED panels rather than complete lighting overhauls.
What Equipment Do I Need for General Session Lighting
Essential equipment for general session lighting includes LED panel lights, light stands, softboxes, and dimmer controls. The specific equipment list depends on venue size, existing lighting infrastructure, and whether you're supplementing or replacing the room's built-in lighting system.
Core equipment list:
Supplementary equipment:
Power requirements:
Calculate total wattage before the event. LED panels typically draw 50-200 watts each, but older tungsten fixtures can draw 500-1,000 watts. Ensure adequate power distribution and avoid overloading circuits.
Quality considerations:
Professional-grade LED panels offer better color rendering (CRI 90+) and more consistent output than consumer models. The price difference is significant - professional panels cost $200-$800 each versus $50-$150 for consumer versions - but the quality difference is immediately visible.
Rent rather than purchase equipment for occasional events. Rental costs typically run 10-15% of purchase price per day, making it cost-effective for events less than 6-8 times per year.
How to Avoid Harsh Shadows and Glare During Presentations
Eliminating harsh shadows and glare requires strategic light placement, proper diffusion, and understanding of basic lighting principles. The key is creating multiple light sources at different angles rather than relying on single, powerful fixtures that create dramatic shadows.
Shadow elimination techniques:
Diffusion methods:
Softboxes, umbrellas, and diffusion panels transform harsh point sources into gentle, even illumination. A 2x2 foot softbox can turn a harsh LED panel into comfortable, shadow-free lighting suitable for close-up presentations.
Common mistakes to avoid:
Never position lights directly behind or in front of presenters. Back lighting creates silhouettes, while front lighting causes harsh shadows on projection screens. Side lighting at 30-45 degree angles provides the best balance of illumination and shadow control.
Test your lighting setup with actual presenters before the event. What looks good on an empty stage may create unexpected shadows or glare when people are present.
Can You Use Natural Light for a General Session or Do You Need Artificial
Natural light can supplement artificial lighting but should never be the primary source for general sessions due to its inconsistency and lack of control. Daylight changes throughout the day, varies with weather conditions, and creates uneven illumination that can compromise presentation visibility and audience comfort.
Natural light challenges:
When natural light works:
Morning events (8-11 AM) with north-facing windows can provide excellent supplementary lighting. The consistent, indirect daylight complements artificial lighting without creating harsh contrasts or glare issues.
Hybrid lighting strategies:
Combine natural and artificial light by using daylight-balanced LED fixtures (5,600K color temperature) near windows and warmer fixtures (3,200K) in interior areas. This creates smooth transitions between natural and artificial light sources.
Control methods:
Install blackout curtains or blinds to control natural light intensity. Automated systems can adjust artificial lighting levels based on available daylight, maintaining consistent illumination regardless of external conditions.
Best practice:
Design your lighting plan assuming no natural light contribution. Any daylight becomes a bonus that can reduce artificial lighting requirements, but your system should function perfectly even on overcast days or during evening events.
For venues with significant natural light, consider hiring experienced lighting professionals who understand how to balance multiple light sources effectively.
What Lighting Setup Works Best for Video Recording a General Session
Video recording requires significantly more light than human vision needs - typically 500-800 lux minimum compared to 200-300 lux for comfortable viewing. The lighting setup must also account for camera positioning, background separation, and consistent color temperature across all fixtures.
Video-specific lighting requirements:
Three-point lighting setup:
Camera-specific considerations:
Position lights to complement camera angles rather than audience viewing. Multiple cameras require lighting that works from various perspectives, often necessitating additional fixtures and more complex planning.
Common video lighting mistakes:
Equipment recommendations:
LED panels with high CRI ratings (95+) provide the best color reproduction for video. Avoid fluorescent fixtures which can create flickering at certain frame rates.
Budget considerations:
Video-quality lighting typically costs 40-60% more than standard general session lighting due to higher equipment requirements and more precise setup needs. Plan accordingly when budgeting for recorded events.
Common Mistakes People Make When Planning Event Lighting
The most frequent lighting mistake is insufficient pre-event testing, leading to last-minute discoveries of shadows, glare, or inadequate illumination. Many event planners assume venue lighting will be sufficient without conducting proper surveys or considering how lighting affects their specific event format.
Top planning mistakes:
Setup and execution errors:
Budget-related mistakes:
Many planners either over-spend on unnecessary equipment or under-budget for essential items. Focus spending on fixtures that directly impact audience experience rather than decorative elements that don't improve functionality.
Communication failures:
Not coordinating with venue staff, AV teams, and presenters leads to conflicting requirements and setup delays. Establish clear communication channels and confirm all lighting requirements in writing before the event.
Prevention strategies:
Create detailed lighting plots, conduct thorough venue surveys, and always test your complete setup 24-48 hours before the event. Build contingency plans for equipment failures and have backup fixtures readily available.
Working with professional AV crews can prevent most common mistakes through their experience with similar events and venues.
How to Light a General Session If You Have a Small Budget
Small budget lighting solutions focus on maximizing existing venue lighting and strategically adding minimal equipment to address specific problem areas. With budgets under $800, prioritize essential improvements over comprehensive lighting overhauls.
Budget-friendly equipment options:
Venue lighting optimization:
Work with facility staff to maximize existing fixtures. Many venues have unused lighting circuits or fixtures that can be activated. Adjust existing dimmer settings and reposition moveable fixtures before adding equipment.
DIY solutions:
Cost-saving strategies:
What to avoid on tight budgets:
Don't compromise on safety equipment like sandbags and proper stands. Cheap light stands can fail and cause injuries or equipment damage. Also avoid mixing too many different light sources, which creates color balance problems that are expensive to fix in post-production if recording.
Professional consultation:
Even with small budgets, consider hiring a lighting consultant for initial planning. A few hours of professional advice can prevent costly mistakes and maximize your limited budget's effectiveness.
What's the Best Color Temperature for Audience Comfort
The optimal color temperature for general sessions ranges from 3,000K to 4,000K, providing warm, comfortable lighting that reduces eye strain during extended viewing periods. This range mimics late morning sunlight and creates an inviting atmosphere while maintaining alertness and focus.
Color temperature guidelines:
Physiological considerations:
Warmer color temperatures (3,000K-3,500K) promote relaxation and comfort but may reduce alertness during long sessions. Cooler temperatures (4,000K-4,500K) maintain alertness but can cause eye strain after 60-90 minutes of exposure.
Event timing factors:
Morning events benefit from slightly cooler temperatures (4,000K) that complement natural alertness cycles. Afternoon and evening events work better with warmer temperatures (3,000K-3,500K) that counteract natural energy decline.
Consistency requirements:
All fixtures in the same space must use identical color temperatures. Mixing 3,200K and 5,600K sources creates uncomfortable visual contrasts and makes the space feel unbalanced.
Special considerations:
Quality factors:
High-quality LED fixtures maintain consistent color temperature throughout their dimming range. Cheaper fixtures may shift color as they dim, creating uncomfortable variations during the event.
Test color temperature preferences with a small group before finalizing your lighting plan. What works in theory may not suit your specific audience or venue characteristics.
How Do You Light a General Session with High Ceilings
High ceiling venues (20+ feet) require more powerful fixtures, careful angle planning, and often specialized rigging equipment to achieve proper illumination. The increased throw distance means lights must be more intense and precisely positioned to avoid creating harsh shadows or uneven coverage.
High ceiling challenges:
Equipment modifications:
Use higher-wattage LED panels (200-400 watts) instead of standard 100-watt fixtures. Consider moving lights or automated fixtures that can be adjusted remotely rather than requiring ladder access for repositioning.
Positioning strategies:
Professional requirements:
High ceiling installations typically require certified rigging professionals and may need structural engineering approval for load calculations. Factor these costs into your budget planning.
Alternative approaches:
Consider ground-based uplighting that bounces off the ceiling for ambient illumination, supplemented by strategically positioned direct fixtures for presenter areas. This approach often costs less than full overhead rigging while providing adequate illumination.
Safety considerations:
All fixtures above 12 feet require safety cables as backup support. Insurance requirements may mandate specific rigging certifications for high ceiling installations.
Should I Hire a Lighting Professional or DIY It
Hire a lighting professional for events with more than 300 attendees, complex venue layouts, video recording requirements, or budgets exceeding $2,000. DIY approaches work for smaller, simpler events where basic supplemental lighting meets your needs.
When to hire professionals:
DIY-appropriate situations:
Cost comparison:
Professional lighting services typically cost $1,500-$5,000 for general sessions, while DIY approaches range from $200-$1,200 in equipment rental. However, professionals include expertise, insurance, and backup equipment that DIY approaches lack.
Hybrid approach:
Consider hiring a professional for initial planning and equipment specification, then handling setup yourself with their guidance. This provides expert knowledge while reducing labor costs.
Risk factors:
DIY lighting mistakes can damage equipment, create safety hazards, or compromise event quality. Professional lighting technicians carry insurance and have experience preventing common problems.
Decision criteria:
If lighting failure would significantly impact your event's success, hire professionals. If you're supplementing adequate existing lighting for a low-stakes event, DIY may be appropriate.
For guidance on finding qualified professionals, review our AV technician staffing guide.
How to Test Lighting Before the Actual Event
Conduct comprehensive lighting tests 24-48 hours before your event to identify and resolve problems while there's still time for adjustments. Testing should simulate actual event conditions including presenter positions, audience seating, and any video recording requirements.
Pre-event testing checklist:
Testing timeline:
What to test specifically:
Position someone at each presenter location while checking for shadows on faces, adequate illumination levels, and comfortable visibility. Have team members sit in various audience positions to identify glare or inadequate lighting.
Documentation process:
Photograph or video record your lighting setup from multiple angles. Document dimmer settings, fixture positions, and any adjustments made during testing. This creates a reference for day-of-event setup.
Problem resolution:
Common issues discovered during testing include insufficient light levels, harsh shadows, and equipment compatibility problems. Allow sufficient time to rent additional equipment or reposition fixtures based on test results.
Final verification:
Conduct a abbreviated lighting check on event day, but avoid major changes that haven't been tested. Focus on confirming equipment functionality and making minor adjustments based on actual attendance levels.
Professional support:
Consider having a lighting technician available during testing to make real-time adjustments and provide technical expertise for problem-solving.
FAQ
How far in advance should I start planning lighting for a general session?
Start planning 2-4 weeks before your event for simple setups, or 6-8 weeks for complex venues or custom requirements. This allows time for venue surveys, equipment sourcing, and proper testing.
What's the minimum lighting level needed for a general session?
General sessions need 200-300 lux for comfortable viewing, or 500-800 lux if recording video. Use a light meter or smartphone app to measure actual levels during your venue survey.
Can I use regular household LED bulbs for event lighting?
Household LEDs lack the color consistency and light output needed for professional events. They also may flicker on camera and have poor color rendering. Invest in proper LED panels designed for events.
How do I calculate how many lights I need for my venue?
A general rule is one 100-watt LED panel per 200-300 square feet of floor space, adjusted for ceiling height and existing lighting. Conduct a venue survey to determine specific needs.
What's the difference between CRI and color temperature?
Color temperature (measured in Kelvin) indicates whether light appears warm or cool. CRI (Color Rendering Index) measures how accurately colors appear under that light. Both matter for quality lighting.
Should all my lights be the same brand and model?
Yes, when possible. Different manufacturers may have slight color variations even at the same stated color temperature. Mixing brands can create subtle but noticeable inconsistencies.
How do I prevent lights from interfering with wireless microphones?
Use LED fixtures instead of fluorescent lights, which can cause RF interference. Position lights away from wireless receiver antennas and test all systems together during your pre-event check.
What safety equipment do I need for lighting setup?
Essential safety equipment includes sandbags for light stands, safety cables for overhead fixtures, proper cable management, and fire-rated extension cords. Never compromise on safety equipment.
Can I adjust lighting during the event without disrupting attendees?
Yes, with proper dimmer controls and careful planning. Make gradual adjustments during natural breaks like speaker transitions. Avoid sudden changes that draw attention to the lighting system.
What happens if a light fails during my event?
Have backup fixtures positioned and ready to activate quickly. Professional setups include redundant lighting for critical areas. Consider hiring a technician to monitor and respond to equipment issues.
How do I handle mixed lighting sources in my venue?
Use color temperature correction gels or filters to match different light sources, or replace existing bulbs with ones matching your fixtures. Consistency across all sources is crucial for professional results.
Is it worth investing in wireless lighting controls?
For events requiring frequent adjustments or multiple lighting zones, wireless controls provide valuable flexibility. For simple setups with minimal changes, basic wired dimmers are sufficient and more reliable.
Conclusion
Successful general session lighting requires careful planning, appropriate equipment selection, and thorough testing to create comfortable, functional illumination for your audience. The key principles include maintaining consistent color temperature between 3,000K-4,000K, eliminating harsh shadows and glare, and ensuring adequate light levels for your specific event requirements.
Start your lighting planning 2-4 weeks in advance with a comprehensive venue survey, budget $500-$5,000 for professional results depending on venue size, and always conduct full system testing 24-48 hours before your event. Remember that general session lighting prioritizes audience comfort and presenter visibility over dramatic effects.
Whether you choose DIY solutions for smaller events or professional services for complex installations, focus on creating even, comfortable illumination that supports your content delivery goals. Avoid common mistakes like insufficient testing, poor equipment positioning, and mixing incompatible light sources.
Ready to ensure your next general session has perfect lighting? AV Labor Source provides experienced lighting technicians and comprehensive event production support nationwide. Our skilled professionals handle everything from initial planning to day-of-event operation, ensuring your lighting enhances rather than distracts from your message. Contact us today to discuss your lighting needs and get a customized quote for your upcoming event.
Key Takeaways:
- General session lighting differs from stage lighting by prioritizing audience comfort and visibility over dramatic effects
- Professional lighting costs range from $500-$5,000 for most corporate events, with DIY options starting at $200-$800
- Essential equipment includes LED panel lights, softboxes, light stands, and dimmer controls for flexibility
- Color temperature between 3,000K-4,000K provides optimal comfort for extended viewing periods
- High ceilings require more powerful fixtures and careful angle planning to avoid harsh shadows
- Natural light can supplement artificial lighting but should never be the primary source due to inconsistency
- Video recording requires additional front-fill lighting and higher overall light levels (500-800 lux minimum)
- Common mistakes include insufficient pre-event testing, ignoring audience sightlines, and poor color temperature mixing
- Budget-conscious options include LED panels, reflectors, and strategic use of existing venue lighting
- Professional lighting technicians are recommended for events over 500 attendees or complex venue layouts
What Is General Session Lighting and Why Does It Matter
General session lighting creates uniform, comfortable illumination for large conference rooms or auditoriums where audiences gather for presentations, keynotes, or corporate meetings. Unlike theatrical stage lighting that emphasizes drama and mood, general session lighting prioritizes visibility, audience comfort, and presenter clarity.
Proper lighting directly impacts audience engagement and retention. Studies show that inadequate lighting causes eye strain within 30 minutes, leading to decreased attention and early departures. For corporate events where information transfer is critical, lighting becomes a business necessity rather than an aesthetic choice.
Key differences from other lighting types:
- Uniformity over drama - Even light distribution prevents hot spots and dark zones
- Comfort-focused color temperature - Warmer tones (3,000K-4,000K) reduce eye fatigue
- Audience-centric design - Lighting serves attendees first, presenters second
- Functional flexibility - Must work for various presentation formats and room configurations
The investment in proper lighting pays dividends through improved audience satisfaction scores and better event outcomes. Poor lighting ranks among the top three complaints at corporate events, making it a critical success factor for event planners.
How Do You Plan Lighting for a Large Conference Room
Planning lighting for a large conference room starts with a comprehensive venue assessment and lighting survey conducted 2-4 weeks before your event. Measure the room dimensions, ceiling height, existing fixtures, and natural light sources to determine your lighting requirements and equipment needs.
Step-by-step planning process:
- Conduct a lighting survey - Visit the venue at the same time of day as your event
- Map existing fixtures - Document location, type, and control options for built-in lighting
- Identify problem areas - Note shadows, glare sources, and uneven illumination zones
- Calculate lighting requirements - Large rooms need 300-500 lux for general sessions
- Plan equipment placement - Position lights to eliminate shadows on presenters and screens
- Consider audience sightlines - Ensure lighting doesn't create glare for attendees
- Design backup systems - Plan redundant lighting for critical areas
Room size considerations:
- Small rooms (under 100 people) - 4-6 LED panels with softboxes typically sufficient
- Medium rooms (100-300 people) - 8-12 fixtures with professional dimming controls
- Large rooms (300+ people) - 15+ fixtures requiring professional AV technicians for setup
Choose fixtures based on throw distance and beam angle. Rooms with 12-foot ceilings need different equipment than 20-foot ceiling venues. Always account for HVAC systems, structural elements, and fire safety requirements when positioning equipment.
What's the Difference Between General Session Lighting and Stage Lighting
General session lighting and stage lighting serve fundamentally different purposes and require distinct approaches. General session lighting prioritizes uniform illumination and audience comfort, while stage lighting creates mood, drama, and visual interest through contrast and color.
General session lighting characteristics:
- Even light distribution across the entire space
- Consistent color temperature (typically 3,000K-4,000K)
- Minimal shadows and contrast
- Audience comfort as primary goal
- Functional rather than artistic approach
Stage lighting characteristics:
- Dramatic contrasts and focused beams
- Multiple color temperatures and effects
- Intentional shadows for depth and dimension
- Entertainment value as primary goal
- Artistic expression through lighting design
Equipment differences:
General sessions use LED panels, softboxes, and flood lights for broad, even coverage. Stage lighting employs spotlights, moving heads, and colored gels for dynamic effects. The control systems also differ - general sessions need simple dimming controls, while stage lighting requires complex programming boards.
Budget implications:
General session lighting typically costs 60-70% less than stage lighting due to simpler equipment requirements and shorter setup times. A general session might need $1,000-$3,000 in lighting, while comparable stage lighting could cost $5,000-$15,000.
For corporate events, resist the temptation to add unnecessary stage lighting effects. Attendees came to absorb information, not be entertained by light shows. Focus your budget on creating comfortable, functional illumination that supports your content delivery goals.
How Much Does Professional Event Lighting Cost
Professional event lighting costs vary significantly based on venue size, equipment requirements, and labor needs. For general sessions, expect to budget $500-$5,000 for most corporate events, with additional costs for specialized requirements or complex venue configurations.
Typical cost breakdown:
- Equipment rental - $300-$2,000 per day depending on fixture count and quality
- Labor costs - $400-$1,500 for setup, operation, and breakdown
- Transportation - $100-$500 for equipment delivery and pickup
- Additional services - $200-$800 for pre-event surveys and testing
Cost factors that increase pricing:
- High ceilings requiring specialized rigging equipment
- Multiple room configurations during the same event
- Video recording requirements needing additional fixtures
- Outdoor or semi-outdoor venues with weather considerations
- Union venues with specific labor requirements
Regional pricing variations:
Major metropolitan areas like New York, Los Angeles, and Chicago typically cost 25-40% more than secondary markets. Las Vegas and Orlando, despite being major event destinations, often offer competitive pricing due to high supplier competition.
Budget-saving strategies:
Work with venues that include basic lighting packages, schedule events during off-peak times for better rates, and consider hiring experienced AV technicians who can maximize existing venue lighting rather than bringing extensive additional equipment.
For events with budgets under $1,000, focus on supplementing existing venue lighting with strategic LED panels rather than complete lighting overhauls.
What Equipment Do I Need for General Session Lighting
Essential equipment for general session lighting includes LED panel lights, light stands, softboxes, and dimmer controls. The specific equipment list depends on venue size, existing lighting infrastructure, and whether you're supplementing or replacing the room's built-in lighting system.
Core equipment list:
- LED panel lights - 4-12 units depending on room size (1x1 or 2x1 foot panels)
- Light stands - Heavy-duty stands rated for your fixture weight
- oftboxes or diffusers - Essential for eliminating harsh shadows
- Extension cables - 25-50 foot lengths for flexible positioning
- Dimmer controls - Manual or DMX-controlled for light level adjustment
- Sandbags or weights - Safety equipment for stand stability
Supplementary equipment:
- Reflectors - Silver or white panels to bounce light into shadow areas
- Barn doors - Control light spill and prevent audience glare
- Color temperature correction gels - Match different light sources
- Backup bulbs or fixtures - Redundancy for critical lighting positions
Power requirements:
Calculate total wattage before the event. LED panels typically draw 50-200 watts each, but older tungsten fixtures can draw 500-1,000 watts. Ensure adequate power distribution and avoid overloading circuits.
Quality considerations:
Professional-grade LED panels offer better color rendering (CRI 90+) and more consistent output than consumer models. The price difference is significant - professional panels cost $200-$800 each versus $50-$150 for consumer versions - but the quality difference is immediately visible.
Rent rather than purchase equipment for occasional events. Rental costs typically run 10-15% of purchase price per day, making it cost-effective for events less than 6-8 times per year.
How to Avoid Harsh Shadows and Glare During Presentations
Eliminating harsh shadows and glare requires strategic light placement, proper diffusion, and understanding of basic lighting principles. The key is creating multiple light sources at different angles rather than relying on single, powerful fixtures that create dramatic shadows.
Shadow elimination techniques:
- Use multiple light sources - Three-point lighting setup with key, fill, and background lights
- Position lights at 45-degree angles - Reduces harsh shadows on faces and presentation materials
- Add fill lighting - Softer lights to brighten shadow areas without creating new shadows
- Employ bounce lighting - Reflect light off walls or ceiling for even distribution
- Glare prevention strategies:
- Control light spill - Use barn doors or flags to prevent light from hitting audience eyes
- Position lights above eye level - Prevents direct glare while maintaining good illumination
- Use indirect lighting - Bounce light off surfaces rather than direct illumination
- Install dimmer controls - Adjust intensity based on ambient light conditions
Diffusion methods:
Softboxes, umbrellas, and diffusion panels transform harsh point sources into gentle, even illumination. A 2x2 foot softbox can turn a harsh LED panel into comfortable, shadow-free lighting suitable for close-up presentations.
Common mistakes to avoid:
Never position lights directly behind or in front of presenters. Back lighting creates silhouettes, while front lighting causes harsh shadows on projection screens. Side lighting at 30-45 degree angles provides the best balance of illumination and shadow control.
Test your lighting setup with actual presenters before the event. What looks good on an empty stage may create unexpected shadows or glare when people are present.
Can You Use Natural Light for a General Session or Do You Need Artificial
Natural light can supplement artificial lighting but should never be the primary source for general sessions due to its inconsistency and lack of control. Daylight changes throughout the day, varies with weather conditions, and creates uneven illumination that can compromise presentation visibility and audience comfort.
Natural light challenges:
- Inconsistent intensity - Brightness varies from 1,000 to 100,000+ lux throughout the day
- Color temperature shifts - Ranges from 2,000K at sunset to 6,500K+ at midday
- Weather dependency - Clouds, rain, and storms create unpredictable lighting conditions
- Directional limitations - Window placement may create glare or inadequate coverage
When natural light works:
Morning events (8-11 AM) with north-facing windows can provide excellent supplementary lighting. The consistent, indirect daylight complements artificial lighting without creating harsh contrasts or glare issues.
Hybrid lighting strategies:
Combine natural and artificial light by using daylight-balanced LED fixtures (5,600K color temperature) near windows and warmer fixtures (3,200K) in interior areas. This creates smooth transitions between natural and artificial light sources.
Control methods:
Install blackout curtains or blinds to control natural light intensity. Automated systems can adjust artificial lighting levels based on available daylight, maintaining consistent illumination regardless of external conditions.
Best practice:
Design your lighting plan assuming no natural light contribution. Any daylight becomes a bonus that can reduce artificial lighting requirements, but your system should function perfectly even on overcast days or during evening events.
For venues with significant natural light, consider hiring experienced lighting professionals who understand how to balance multiple light sources effectively.
What Lighting Setup Works Best for Video Recording a General Session
Video recording requires significantly more light than human vision needs - typically 500-800 lux minimum compared to 200-300 lux for comfortable viewing. The lighting setup must also account for camera positioning, background separation, and consistent color temperature across all fixtures.
Video-specific lighting requirements:
- Higher intensity levels - Cameras need 2-3x more light than human eyes
- Consistent color temperature - All fixtures must match to avoid color correction issues
- Even distribution - Eliminates exposure variations across the frame
- Background separation - Prevents subjects from blending into backgrounds
Three-point lighting setup:
- Key light - Primary illumination positioned 30-45 degrees from camera
- Fill light - Softer light opposite the key light to reduce shadows
- Background light - Separates subjects from background, adds depth
Camera-specific considerations:
Position lights to complement camera angles rather than audience viewing. Multiple cameras require lighting that works from various perspectives, often necessitating additional fixtures and more complex planning.
Common video lighting mistakes:
- Insufficient light levels causing grainy, noisy footage
- Mixed color temperatures creating color balance problems
- Backlighting that silhouettes speakers against bright backgrounds
- Flickering lights that create strobing effects on camera
Equipment recommendations:
LED panels with high CRI ratings (95+) provide the best color reproduction for video. Avoid fluorescent fixtures which can create flickering at certain frame rates.
Budget considerations:
Video-quality lighting typically costs 40-60% more than standard general session lighting due to higher equipment requirements and more precise setup needs. Plan accordingly when budgeting for recorded events.
Common Mistakes People Make When Planning Event Lighting
The most frequent lighting mistake is insufficient pre-event testing, leading to last-minute discoveries of shadows, glare, or inadequate illumination. Many event planners assume venue lighting will be sufficient without conducting proper surveys or considering how lighting affects their specific event format.
Top planning mistakes:
- Skipping venue lighting surveys - Not assessing existing conditions before the event
- Ignoring audience sightlines - Positioning lights that create glare for attendees
- Underestimating power requirements - Insufficient electrical capacity for lighting needs
- Poor color temperature mixing - Combining warm and cool lights without correction
- Inadequate backup planning - No redundancy for critical lighting positions
Setup and execution errors:
- Last-minute equipment changes - Discovering incompatible fixtures during setup
- Insufficient safety measures - Unstable light stands or inadequate cable management
- Wrong fixture positioning - Creating shadows on screens or presenter faces
- Overlooking dimmer controls - No ability to adjust lighting during the event
Budget-related mistakes:
Many planners either over-spend on unnecessary equipment or under-budget for essential items. Focus spending on fixtures that directly impact audience experience rather than decorative elements that don't improve functionality.
Communication failures:
Not coordinating with venue staff, AV teams, and presenters leads to conflicting requirements and setup delays. Establish clear communication channels and confirm all lighting requirements in writing before the event.
Prevention strategies:
Create detailed lighting plots, conduct thorough venue surveys, and always test your complete setup 24-48 hours before the event. Build contingency plans for equipment failures and have backup fixtures readily available.
Working with professional AV crews can prevent most common mistakes through their experience with similar events and venues.
How to Light a General Session If You Have a Small Budget
Small budget lighting solutions focus on maximizing existing venue lighting and strategically adding minimal equipment to address specific problem areas. With budgets under $800, prioritize essential improvements over comprehensive lighting overhauls.
Budget-friendly equipment options:
- LED panel lights - $100-$300 each for decent quality fixtures
- Clamp lights with daylight bulbs - $25-$50 per fixture for basic supplemental lighting
- Reflector panels - $30-$80 for bouncing existing light into shadow areas
- Extension cords and basic stands - $100-$200 for positioning flexibility
Venue lighting optimization:
Work with facility staff to maximize existing fixtures. Many venues have unused lighting circuits or fixtures that can be activated. Adjust existing dimmer settings and reposition moveable fixtures before adding equipment.
DIY solutions:
- Bounce cards - White foam core boards ($10-$15) reflect light effectively
- Diffusion materials - Shower curtains or white fabric soften harsh lights
- Strategic positioning - Use existing architectural features to redirect light
Cost-saving strategies:
- Rent equipment locally rather than shipping from distant suppliers
- Partner with other events in the same venue to share equipment costs
- Use consumer-grade LED panels for non-critical positions
- Focus on problem areas rather than complete room lighting
What to avoid on tight budgets:
Don't compromise on safety equipment like sandbags and proper stands. Cheap light stands can fail and cause injuries or equipment damage. Also avoid mixing too many different light sources, which creates color balance problems that are expensive to fix in post-production if recording.
Professional consultation:
Even with small budgets, consider hiring a lighting consultant for initial planning. A few hours of professional advice can prevent costly mistakes and maximize your limited budget's effectiveness.
What's the Best Color Temperature for Audience Comfort
The optimal color temperature for general sessions ranges from 3,000K to 4,000K, providing warm, comfortable lighting that reduces eye strain during extended viewing periods. This range mimics late morning sunlight and creates an inviting atmosphere while maintaining alertness and focus.
Color temperature guidelines:
- 3,000K - Warm white, ideal for evening events and intimate settings
- 3,500K - Neutral warm, good balance for most corporate events
- 4,000K - Cool white, suitable for daytime events and technical presentations
- 5,000K+ - Too cool for comfort, causes eye fatigue in extended exposure
Physiological considerations:
Warmer color temperatures (3,000K-3,500K) promote relaxation and comfort but may reduce alertness during long sessions. Cooler temperatures (4,000K-4,500K) maintain alertness but can cause eye strain after 60-90 minutes of exposure.
Event timing factors:
Morning events benefit from slightly cooler temperatures (4,000K) that complement natural alertness cycles. Afternoon and evening events work better with warmer temperatures (3,000K-3,500K) that counteract natural energy decline.
Consistency requirements:
All fixtures in the same space must use identical color temperatures. Mixing 3,200K and 5,600K sources creates uncomfortable visual contrasts and makes the space feel unbalanced.
Special considerations:
- Video recording - Requires consistent color temperature across all fixtures
- Multi-generational audiences - Older attendees prefer warmer temperatures
- International events - Cultural preferences vary, with some regions preferring cooler lighting
Quality factors:
High-quality LED fixtures maintain consistent color temperature throughout their dimming range. Cheaper fixtures may shift color as they dim, creating uncomfortable variations during the event.
Test color temperature preferences with a small group before finalizing your lighting plan. What works in theory may not suit your specific audience or venue characteristics.
How Do You Light a General Session with High Ceilings
High ceiling venues (20+ feet) require more powerful fixtures, careful angle planning, and often specialized rigging equipment to achieve proper illumination. The increased throw distance means lights must be more intense and precisely positioned to avoid creating harsh shadows or uneven coverage.
High ceiling challenges:
- Increased throw distance - Light intensity follows inverse square law, requiring 4x more power to double the distance
- Mounting difficulties - Fixtures need professional rigging or specialized stands
- Beam angle considerations - Wide beams may create light spill, narrow beams create hot spots
- Safety requirements - Additional safety cables and structural load calculations
Equipment modifications:
Use higher-wattage LED panels (200-400 watts) instead of standard 100-watt fixtures. Consider moving lights or automated fixtures that can be adjusted remotely rather than requiring ladder access for repositioning.
Positioning strategies:
- Steep angles - Position lights at 60-70 degree angles to reach the floor effectively
- Multiple fixture layers - Use fixtures at different heights for even coverage
- Wall washing - Bounce light off walls to supplement direct illumination
- Architectural integration - Utilize existing structural elements for mounting points
Professional requirements:
High ceiling installations typically require certified rigging professionals and may need structural engineering approval for load calculations. Factor these costs into your budget planning.
Alternative approaches:
Consider ground-based uplighting that bounces off the ceiling for ambient illumination, supplemented by strategically positioned direct fixtures for presenter areas. This approach often costs less than full overhead rigging while providing adequate illumination.
Safety considerations:
All fixtures above 12 feet require safety cables as backup support. Insurance requirements may mandate specific rigging certifications for high ceiling installations.
Should I Hire a Lighting Professional or DIY It
Hire a lighting professional for events with more than 300 attendees, complex venue layouts, video recording requirements, or budgets exceeding $2,000. DIY approaches work for smaller, simpler events where basic supplemental lighting meets your needs.
When to hire professionals:
- Large venues - Over 300 attendees or complex room configurations
- High stakes events - CEO presentations, client meetings, or recorded sessions
- Technical complexity - Multiple lighting zones, automated controls, or specialized effects
- Safety concerns - High ceilings, outdoor venues, or challenging installation requirements
- Time constraints - Limited setup time or simultaneous events
DIY-appropriate situations:
- Small venues - Under 100 attendees with straightforward lighting needs
- Simple supplementation - Adding a few fixtures to existing venue lighting
- Flexible timelines - Adequate time for testing and adjustment
- Basic equipment - Standard LED panels and light stands
- Low-risk events - Internal meetings or informal presentations
Cost comparison:
Professional lighting services typically cost $1,500-$5,000 for general sessions, while DIY approaches range from $200-$1,200 in equipment rental. However, professionals include expertise, insurance, and backup equipment that DIY approaches lack.
Hybrid approach:
Consider hiring a professional for initial planning and equipment specification, then handling setup yourself with their guidance. This provides expert knowledge while reducing labor costs.
Risk factors:
DIY lighting mistakes can damage equipment, create safety hazards, or compromise event quality. Professional lighting technicians carry insurance and have experience preventing common problems.
Decision criteria:
If lighting failure would significantly impact your event's success, hire professionals. If you're supplementing adequate existing lighting for a low-stakes event, DIY may be appropriate.
For guidance on finding qualified professionals, review our AV technician staffing guide.
How to Test Lighting Before the Actual Event
Conduct comprehensive lighting tests 24-48 hours before your event to identify and resolve problems while there's still time for adjustments. Testing should simulate actual event conditions including presenter positions, audience seating, and any video recording requirements.
Pre-event testing checklist:
- Full system power-up - Test all fixtures, controls, and backup systems
- Presenter positioning - Check lighting from all speaking positions
- Audience sightlines - Verify no glare from various seating locations
- Video recording angles - Test lighting from all camera positions
- Dimmer functionality - Confirm all control systems operate correctly
- Emergency procedures - Test backup lighting and failure protocols
Testing timeline:
- 2-4 weeks before - Initial venue survey and equipment planning
- 1 week before - Equipment delivery and initial setup
- 24-48 hours before - Full system testing with simulated conditions
- Day of event - Final checks and minor adjustments only
What to test specifically:
Position someone at each presenter location while checking for shadows on faces, adequate illumination levels, and comfortable visibility. Have team members sit in various audience positions to identify glare or inadequate lighting.
Documentation process:
Photograph or video record your lighting setup from multiple angles. Document dimmer settings, fixture positions, and any adjustments made during testing. This creates a reference for day-of-event setup.
Problem resolution:
Common issues discovered during testing include insufficient light levels, harsh shadows, and equipment compatibility problems. Allow sufficient time to rent additional equipment or reposition fixtures based on test results.
Final verification:
Conduct a abbreviated lighting check on event day, but avoid major changes that haven't been tested. Focus on confirming equipment functionality and making minor adjustments based on actual attendance levels.
Professional support:
Consider having a lighting technician available during testing to make real-time adjustments and provide technical expertise for problem-solving.
FAQ
How far in advance should I start planning lighting for a general session?
Start planning 2-4 weeks before your event for simple setups, or 6-8 weeks for complex venues or custom requirements. This allows time for venue surveys, equipment sourcing, and proper testing.
What's the minimum lighting level needed for a general session?
General sessions need 200-300 lux for comfortable viewing, or 500-800 lux if recording video. Use a light meter or smartphone app to measure actual levels during your venue survey.
Can I use regular household LED bulbs for event lighting?
Household LEDs lack the color consistency and light output needed for professional events. They also may flicker on camera and have poor color rendering. Invest in proper LED panels designed for events.
How do I calculate how many lights I need for my venue?
A general rule is one 100-watt LED panel per 200-300 square feet of floor space, adjusted for ceiling height and existing lighting. Conduct a venue survey to determine specific needs.
What's the difference between CRI and color temperature?
Color temperature (measured in Kelvin) indicates whether light appears warm or cool. CRI (Color Rendering Index) measures how accurately colors appear under that light. Both matter for quality lighting.
Should all my lights be the same brand and model?
Yes, when possible. Different manufacturers may have slight color variations even at the same stated color temperature. Mixing brands can create subtle but noticeable inconsistencies.
How do I prevent lights from interfering with wireless microphones?
Use LED fixtures instead of fluorescent lights, which can cause RF interference. Position lights away from wireless receiver antennas and test all systems together during your pre-event check.
What safety equipment do I need for lighting setup?
Essential safety equipment includes sandbags for light stands, safety cables for overhead fixtures, proper cable management, and fire-rated extension cords. Never compromise on safety equipment.
Can I adjust lighting during the event without disrupting attendees?
Yes, with proper dimmer controls and careful planning. Make gradual adjustments during natural breaks like speaker transitions. Avoid sudden changes that draw attention to the lighting system.
What happens if a light fails during my event?
Have backup fixtures positioned and ready to activate quickly. Professional setups include redundant lighting for critical areas. Consider hiring a technician to monitor and respond to equipment issues.
How do I handle mixed lighting sources in my venue?
Use color temperature correction gels or filters to match different light sources, or replace existing bulbs with ones matching your fixtures. Consistency across all sources is crucial for professional results.
Is it worth investing in wireless lighting controls?
For events requiring frequent adjustments or multiple lighting zones, wireless controls provide valuable flexibility. For simple setups with minimal changes, basic wired dimmers are sufficient and more reliable.
Conclusion
Successful general session lighting requires careful planning, appropriate equipment selection, and thorough testing to create comfortable, functional illumination for your audience. The key principles include maintaining consistent color temperature between 3,000K-4,000K, eliminating harsh shadows and glare, and ensuring adequate light levels for your specific event requirements.
Start your lighting planning 2-4 weeks in advance with a comprehensive venue survey, budget $500-$5,000 for professional results depending on venue size, and always conduct full system testing 24-48 hours before your event. Remember that general session lighting prioritizes audience comfort and presenter visibility over dramatic effects.
Whether you choose DIY solutions for smaller events or professional services for complex installations, focus on creating even, comfortable illumination that supports your content delivery goals. Avoid common mistakes like insufficient testing, poor equipment positioning, and mixing incompatible light sources.
Ready to ensure your next general session has perfect lighting? AV Labor Source provides experienced lighting technicians and comprehensive event production support nationwide. Our skilled professionals handle everything from initial planning to day-of-event operation, ensuring your lighting enhances rather than distracts from your message. Contact us today to discuss your lighting needs and get a customized quote for your upcoming event.
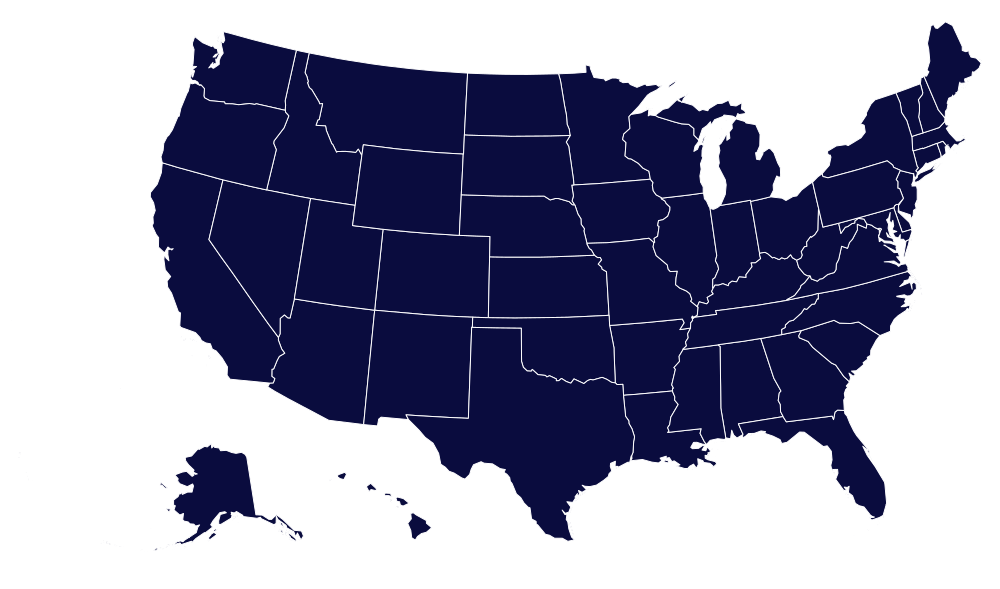
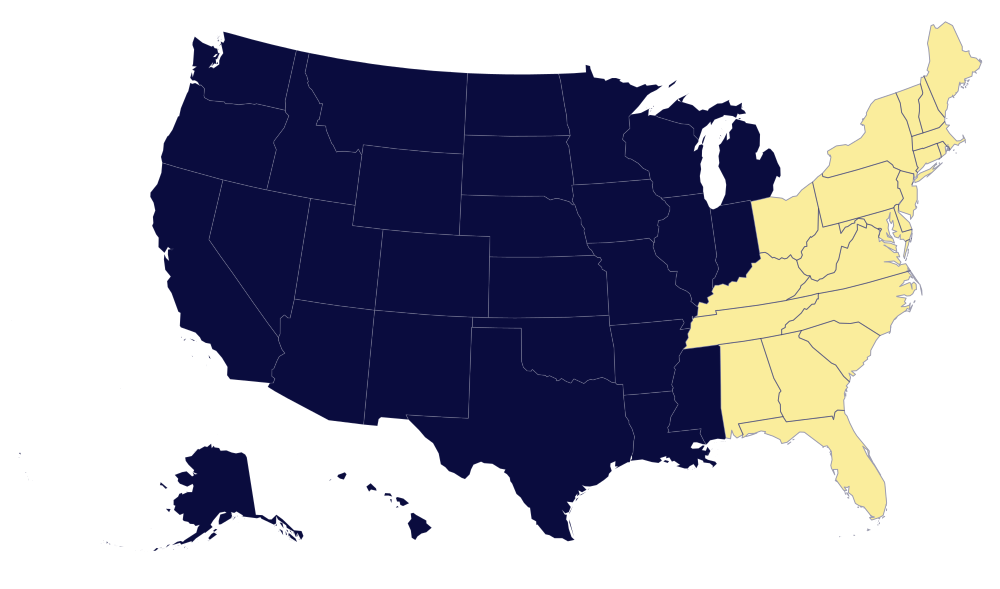
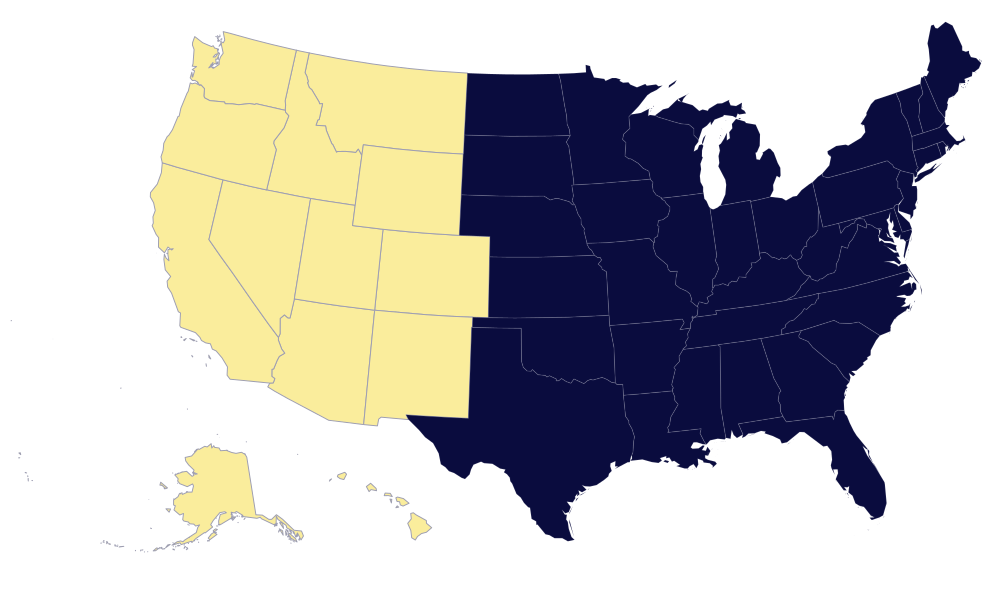
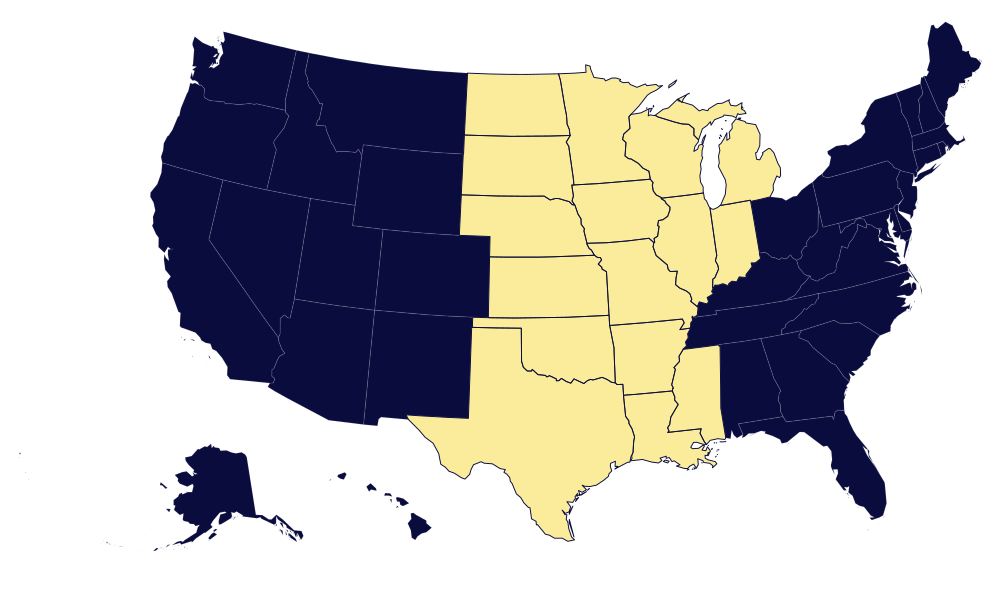
AVLS Nationwide Services
Central States
East Coast
*COMING SOON
West Coast

*COMING SOON
East Coast
Central States
West Coast
AVLS Nationwide Services
CONTACT US
When your event matters, trust your audio visual labor needs to AV Labor Source.
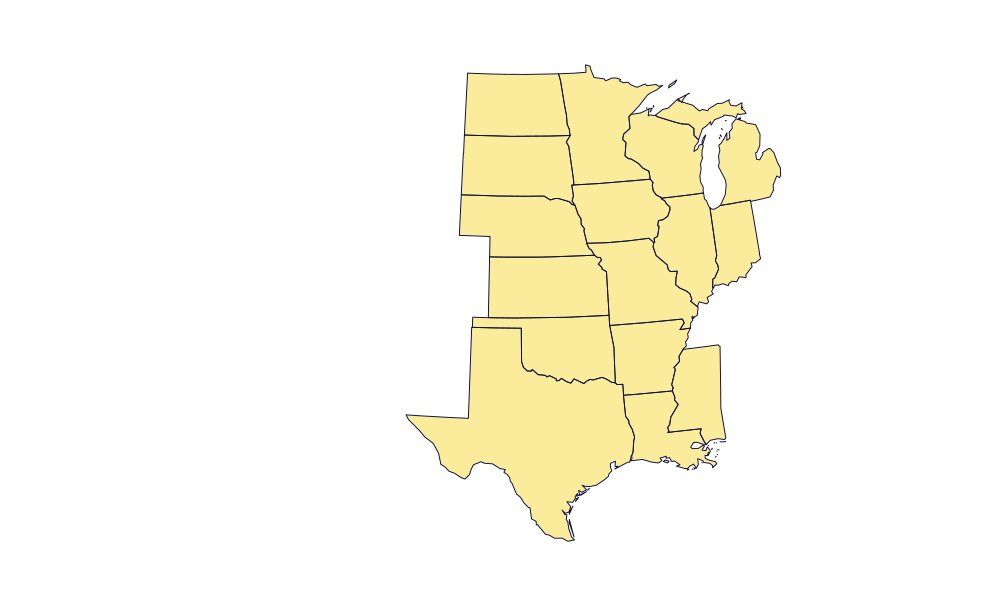
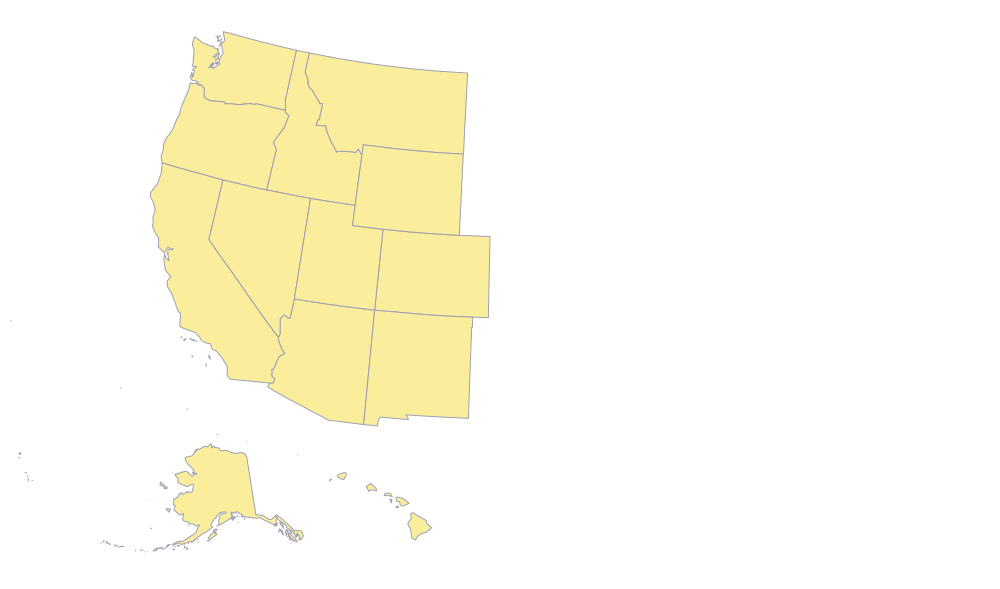
AVLS operate and has proven pool of AV technicians in major cities US Nationwide, such as Las Vegas, Los Angeles, Orlando, Dallas, San Antonio, Austin, Houston, Washington DC, Atlanta, New Orleans, Tennessee and more.
Please complete the form below and we will respond to you as soon as possible. We are available 24 hours a day to assist with your needs. We look forward to showing you what we can do toward the success of your next event.
AVLS operate and has proven pool of AV technicians in major cities US Nationwide, such as Las Vegas, Los Angeles, Orlando, Dallas, San Antonio, Austin, Houston, Washington DC, Atlanta, New Orleans, Tennessee and more.
Please complete the form below and we will respond to you as soon as possible. We are available 24 hours a day to assist with your needs. We look forward to showing you what we can do toward the success of your next event.
EVENT INFORMATION
